Arduino first steps: Unterschied zwischen den Versionen
Aus www.wiki.ardumower.de
| Zeile 1: | Zeile 1: | ||
This page describes how to start with your Arduino that you can purchase via the [https://www.marotronics.de/index.php?k=32 shop] [[File: shopping.png|link=https://www.marotronics.de/index.php?k=7]]. | This page describes how to start with your Arduino that you can purchase via the [https://www.marotronics.de/index.php?k=32 shop] [[File: shopping.png|link=https://www.marotronics.de/index.php?k=7]]. | ||
| − | + | <b>1. Attach the Arduino to your computer</b> | |
Using an USB cable, attach the Arduino (Arduino Nano or Arduino Mega) to your computer as shown below. | Using an USB cable, attach the Arduino (Arduino Nano or Arduino Mega) to your computer as shown below. | ||
<gallery> | <gallery> | ||
| Zeile 9: | Zeile 9: | ||
</gallery> | </gallery> | ||
| − | + | <b>2. Download</b> | |
Click here to download the Arduino development software to your computer (Windows users should download the 'Installer' version on that page): | Click here to download the Arduino development software to your computer (Windows users should download the 'Installer' version on that page): | ||
[[File: Arduino symbol small.jpg |link=http://arduino.cc/en/Main/Software#toc3]] | [[File: Arduino symbol small.jpg |link=http://arduino.cc/en/Main/Software#toc3]] | ||
| − | + | <b>3. Install</b> | |
After the download completed, install the Arduino development software on your computer: | After the download completed, install the Arduino development software on your computer: | ||
For Windows, double click the file 'arduino-1.5.8-windows.exe' in your Windows file explorer. | For Windows, double click the file 'arduino-1.5.8-windows.exe' in your Windows file explorer. | ||
| − | + | <b>4. Run</b> | |
After the installation completed, run the Arduino development software on your computer | After the installation completed, run the Arduino development software on your computer | ||
by double clicking the 'Arduino' symbol on your Windows desktop. | by double clicking the 'Arduino' symbol on your Windows desktop. | ||
[[File: Arduino_start_symbol_small.jpg]] | [[File: Arduino_start_symbol_small.jpg]] | ||
| − | + | <b>5. Choose blink example</b> | |
Via the menu, click on 'File->Examples->Basics->Blink'. This will load the Arduino blink example. | Via the menu, click on 'File->Examples->Basics->Blink'. This will load the Arduino blink example. | ||
[[File: Arduino ide blink example.jpg]] | [[File: Arduino ide blink example.jpg]] | ||
| − | + | <b>6. Choose correct board type</b> | |
Via the menu, click on 'Tools->Board->Arduino Nano' to choose your Nano board (or Arduino Mega 2560 if you want to use a Mega board). | Via the menu, click on 'Tools->Board->Arduino Nano' to choose your Nano board (or Arduino Mega 2560 if you want to use a Mega board). | ||
[[File: Arduino ide choose board.jpg]] | [[File: Arduino ide choose board.jpg]] | ||
| − | + | <b>7. Choose correct USB serial port</b> | |
Via the menu, click on 'Tools->Port', and choose the detected USB serial port. | Via the menu, click on 'Tools->Port', and choose the detected USB serial port. | ||
[[File: Arduino ide choose port.jpg]] | [[File: Arduino ide choose port.jpg]] | ||
| − | + | <b>8. Upload the blink example</b> | |
Click on the 'Upload' symbol to upload the blink example to your Arduino. After the upload completed, your Arduino will start to blink! | Click on the 'Upload' symbol to upload the blink example to your Arduino. After the upload completed, your Arduino will start to blink! | ||
[[File: Arduino ide upload.jpg]] | [[File: Arduino ide upload.jpg]] | ||
| − | Congratulations! You have just programmed your first Arduino! | + | <b>Congratulations!</b> You have just programmed your first Arduino! |
Version vom 24. November 2014, 12:31 Uhr
This page describes how to start with your Arduino that you can purchase via the shop ![]() .
.
1. Attach the Arduino to your computer
Using an USB cable, attach the Arduino (Arduino Nano or Arduino Mega) to your computer as shown below.
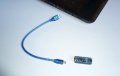
Arduino Nano and USB cable
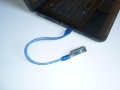
Arduino Nano connected via USB
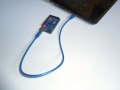
Arduino Mega 2560 connected via USB


2. Download
Click here to download the Arduino development software to your computer (Windows users should download the 'Installer' version on that page):

3. Install
After the download completed, install the Arduino development software on your computer:
For Windows, double click the file 'arduino-1.5.8-windows.exe' in your Windows file explorer.
4. Run
After the installation completed, run the Arduino development software on your computer
by double clicking the 'Arduino' symbol on your Windows desktop.

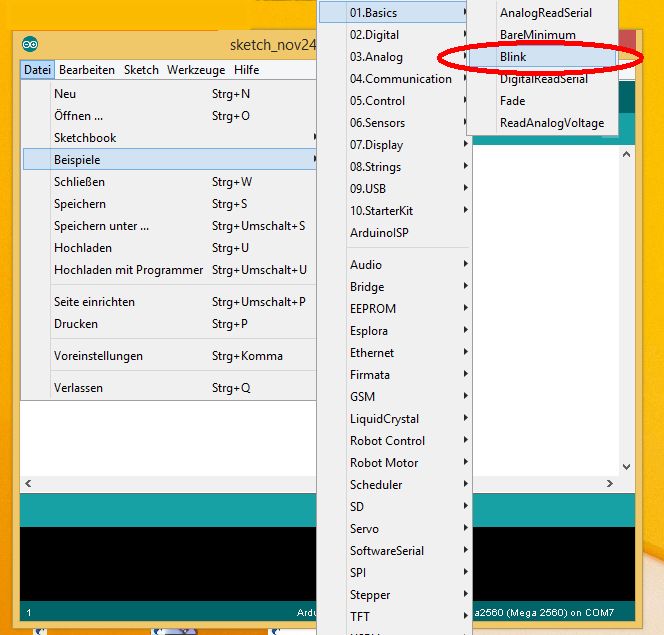
5. Choose blink example
Via the menu, click on 'File->Examples->Basics->Blink'. This will load the Arduino blink example.

6. Choose correct board type
Via the menu, click on 'Tools->Board->Arduino Nano' to choose your Nano board (or Arduino Mega 2560 if you want to use a Mega board).


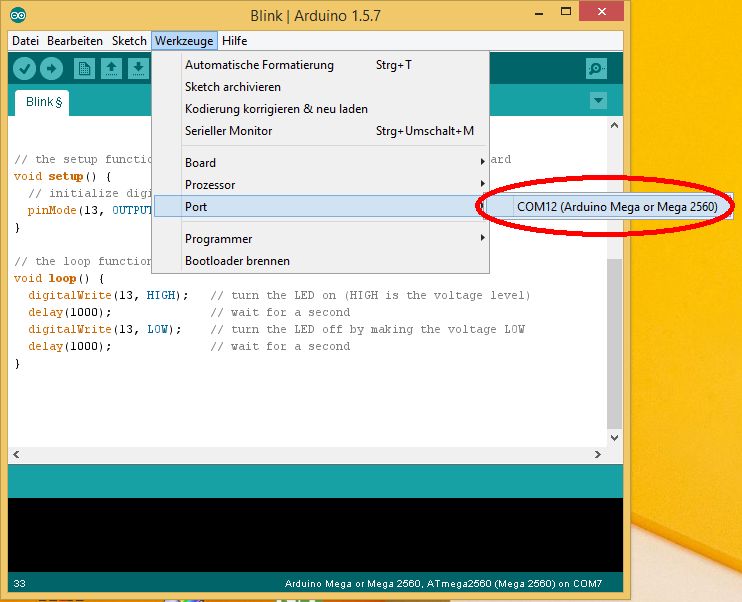
7. Choose correct USB serial port
Via the menu, click on 'Tools->Port', and choose the detected USB serial port.

8. Upload the blink example
Click on the 'Upload' symbol to upload the blink example to your Arduino. After the upload completed, your Arduino will start to blink!


Congratulations! You have just programmed your first Arduino!