Bumper sensor: Unterschied zwischen den Versionen
Aus www.wiki.ardumower.de
(→Code) |
(→Code) |
||
| Zeile 34: | Zeile 34: | ||
5 -- USB-TTL RX | 5 -- USB-TTL RX | ||
6 -- USB-TTL DTR (reset) | 6 -- USB-TTL DTR (reset) | ||
| + | |||
| + | =Connecting to Ardumower= | ||
| + | |||
| + | BUMPER-OC | ||
| + | DC1 -- bumper1 output | ||
| + | DC2 -- bumper2 output | ||
=Videos= | =Videos= | ||
#[https://www.youtube.com/watch?v=IW93kSheB68 Introduction BumperDuino] | #[https://www.youtube.com/watch?v=IW93kSheB68 Introduction BumperDuino] | ||
#[https://www.youtube.com/watch?v=Crvdqs4AtvQ Making Of BumperDuino] | #[https://www.youtube.com/watch?v=Crvdqs4AtvQ Making Of BumperDuino] | ||
Version vom 15. Januar 2016, 00:42 Uhr
Inhaltsverzeichnis
Abstract
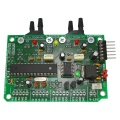
Ardumower's bumper sensor (called 'BumperDuino') is based on a pressure sensor and helps us to detect obstacles.
The PCB module and sensor can be purchased as complete kit via the shop ![]() .
.
Building instructions
Building instructions as well as instructions for programming the Arduino can be found in the BumperDuino manual.
Schematics
Code
You can download the Arduino Code here. Important: Choose 'Arduino Uno' as bootloader.
To upload the code, set jumper to 'VUSB' and connect an USB-TTL adapter to J4 (USB-LIGHT) as follows:
J4 (USB-LIGHT)
1 -- USB-TTL GND
2 -- not used
3 -- USB-TTL +5V
4 -- USB-TTL TX
5 -- USB-TTL RX
6 -- USB-TTL DTR (reset)
Connecting to Ardumower
BUMPER-OC
DC1 -- bumper1 output
DC2 -- bumper2 output


