Alfred Assembly: Unterschied zwischen den Versionen
Aus www.wiki.ardumower.de
BenPan (Diskussion | Beiträge) (→Connection of electricity thieves) |
BenPan (Diskussion | Beiträge) (→Connection of electricity thieves) |
||
| Zeile 26: | Zeile 26: | ||
File: Alfred_ElectricityThieves2.JPEG | Alfred_ElectricityThieves 2 | File: Alfred_ElectricityThieves2.JPEG | Alfred_ElectricityThieves 2 | ||
</gallery> | </gallery> | ||
| + | |||
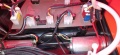
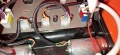
| + | The enclosed electricity thieves are to divert the supply voltage from Alfred. Please press the black cable (-) to the black cable from the red connector (battery cable) and the red cable (+) to the black cable from the blue connector (on/off switch). | ||
==Remaining ribbon cable from the control panel== | ==Remaining ribbon cable from the control panel== | ||
Version vom 17. Mai 2023, 10:03 Uhr
This page describes the assembly of the Alfrd DIY kit that you can purchase via the [1]  .
.
Inhaltsverzeichnis
Videos
- Alfred DIY - Montage des Bedienpanels
- Montage der RTK Basisstation | Assembly of RTK base | ArduMower / Alfred
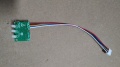
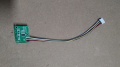
Assembly of the LED-Board
Alfred_LED_Board 1
Alfred_LED_Board 2
Alfred_LED_Board 3


Connection of electricity thieves
Alfred_ElectricityThieves 1
Alfred_ElectricityThieves 2


The enclosed electricity thieves are to divert the supply voltage from Alfred. Please press the black cable (-) to the black cable from the red connector (battery cable) and the red cable (+) to the black cable from the blue connector (on/off switch).
