AzuritBer Pi Firmware (English): Unterschied zwischen den Versionen
(→Build the SD Card) |
(→Build the SD Card) |
||
| Zeile 24: | Zeile 24: | ||
It's easy using the main raspberry.org site. | It's easy using the main raspberry.org site. | ||
| + | |||
| + | You can connect you Micro SD to your laptop or PC using correct adaptor | ||
| + | |||
| + | No need to format at the point but '''All Data present on it will be destroyed.''' | ||
Connect to : https://www.raspberrypi.org/ | Connect to : https://www.raspberrypi.org/ | ||
| Zeile 29: | Zeile 33: | ||
[[Datei:Buster001.png|400px]] and select the Download page | [[Datei:Buster001.png|400px]] and select the Download page | ||
| − | + | ---- | |
| − | + | [[Datei:Buster002.png|400px]] Select Raspberry Pi Imager for Windows | |
| − | [[Datei:Buster002.png|400px]] | + | ---- |
| − | + | Wait until the download is finish and launch the downloaded prog. | |
| − | [[Datei:Buster003.png|400px]] | + | ---- |
| − | + | [[Datei:Buster003.png|400px]] Select Choose OS | |
| − | + | ---- | |
| − | [[Datei:Buster004.png|400px]] | + | [[Datei:Buster004.png|400px]] Use the recommended one with Desktop |
| − | + | ---- | |
| − | [[Datei:Buster005.png|400px]] | + | [[Datei:Buster005.png|400px]] Select Choose SD CARD |
| − | + | ---- | |
| − | [[Datei:Buster006.png|400px]] | + | [[Datei:Buster006.png|400px]] Select your SD CARD Be careful to select the correct one. |
| + | ---- | ||
| + | [[Datei:Buster007.png|400px]] Select Write and wait until down (can take 15 to 60 Min according your internet speed). | ||
Version vom 5. November 2020, 19:30 Uhr
Level 2 Raspberry Pi
A Raspberry Pi is connected over Due Native USB to the arduino
What you need
1 Raspberry PI 3B+ or PI4 (The Pizero W can work but very slowly and it's not the goal).
1 DC/DC voltage regulator to power the PI.Minumum 5A version from marotronics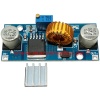 https://www.marotronics.de/5A-DC-DC-step-down-module-XL4015-with-heat-sink-eg-for-Arduino
1 USB mouse,keyboard for setting.You can simply use a standard one for the setting and disconnect it after But it's also possible to use a small one like that to drive the mower remotely in manual mode.
1 PowerBank or DC/DC voltage regulator connected to PCB1.3 or power supply for the raspberry pi minimum 3A
1 HDMI cable to see the PI desktop on your TV or HDMI Screen.
1 TV or monitor with HDMI input to easily see the raspberry IP adress on the first boot.
Build the SD Card
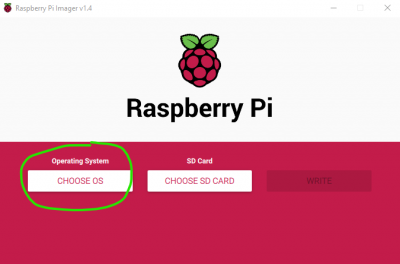
You need to first write the raspbian OS on the SD Card .
It's easy using the main raspberry.org site.
You can connect you Micro SD to your laptop or PC using correct adaptor
No need to format at the point but All Data present on it will be destroyed.
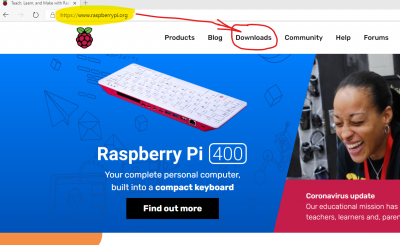
Connect to : https://www.raspberrypi.org/
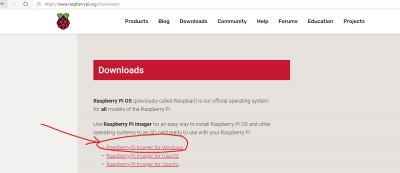 Select Raspberry Pi Imager for Windows
Wait until the download is finish and launch the downloaded prog.
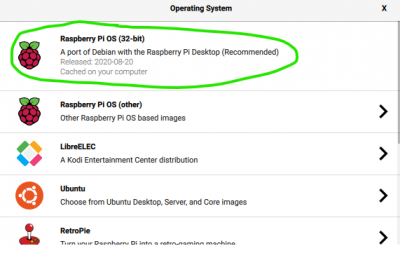 Use the recommended one with Desktop
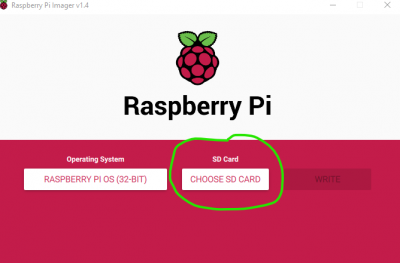
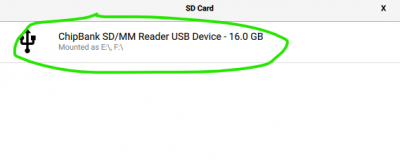 Select your SD CARD Be careful to select the correct one.
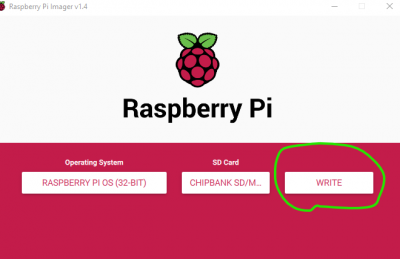 Select Write and wait until down (can take 15 to 60 Min according your internet speed).
