Ardumower Gasoline: Unterschied zwischen den Versionen
| Zeile 1: | Zeile 1: | ||
'''Ardumower Gasoline R/C''' is an ordinary gasoline powered mower converted to '''remote control (R/C)''' using Ardumower parts. | '''Ardumower Gasoline R/C''' is an ordinary gasoline powered mower converted to '''remote control (R/C)''' using Ardumower parts. | ||
| − | |||
[[File: Ardumower_gasoline1.jpg | x300px]] | [[File: Ardumower_gasoline1.jpg | x300px]] | ||
[[File: Ardumower_gasoline5.jpg | x300px]] | [[File: Ardumower_gasoline5.jpg | x300px]] | ||
| + | [[File: Ardumower_remote.jpg | x100px]] | ||
=Parts list= | =Parts list= | ||
Version vom 29. August 2017, 20:08 Uhr
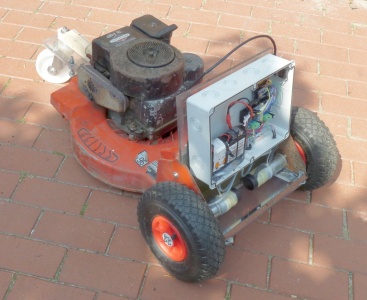
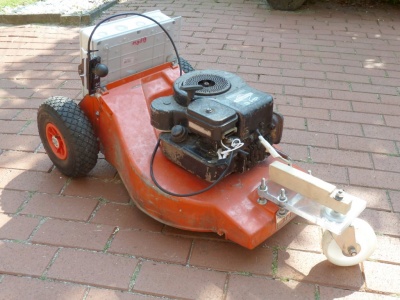
Ardumower Gasoline R/C is an ordinary gasoline powered mower converted to remote control (R/C) using Ardumower parts.
Inhaltsverzeichnis
Parts list
Click on a part for more details:
- 2x 260mm tires
- this 3d printed tire adapter or this one
- 1x free wheel
- 2x clamping elements
- 2x Ardumower gear motors
- 2x motor drivers BTS7960
- 1x Ardumower Power pack charger
- 1x Ardumower Power pack battery
- 1x DC/DC converter
- 1x Arduino Nano
- Arduino Nano I/O shield
- a model R/C receiver and a remote control
- 1x fuse holder
- 1x fuse 4A
- 1x diode 10A
- 1x emergency switch
- 1x charging socket
Motors
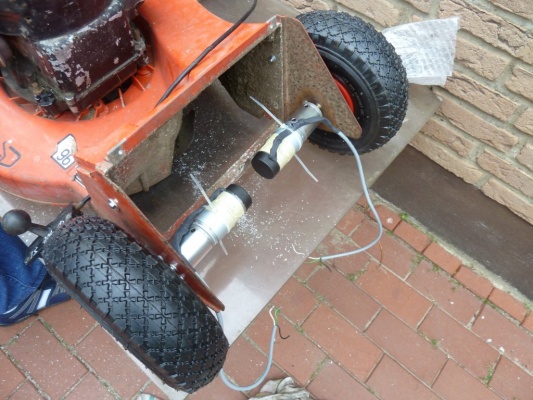
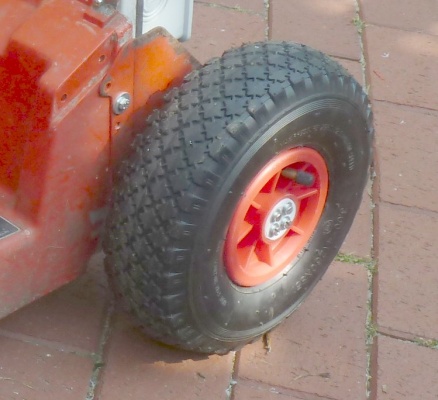
Find a place on your mower for the gear motors. Use the clamping elements and the tire adapters to attach the tires to the motors.
Free wheel
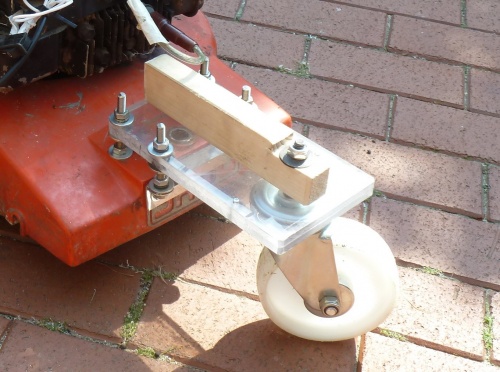
Use 4 screws and a plate to support the free wheel.
Control box
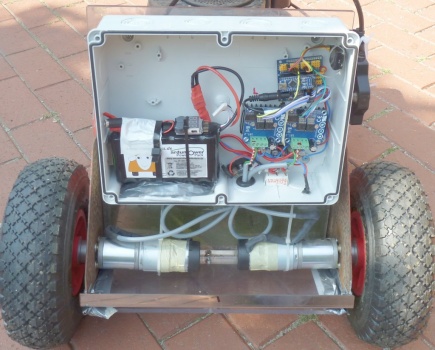
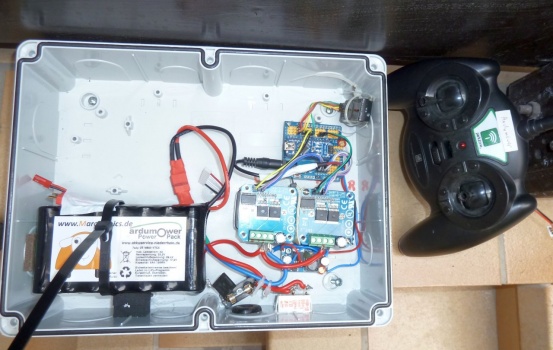
Mount the Ardumower Power Pack battery, emergency switch, fuse holder, BTS7960 motor drivers, Arduino Nano, DC/DC converter and the model R/C receiver in a box.
Wiring
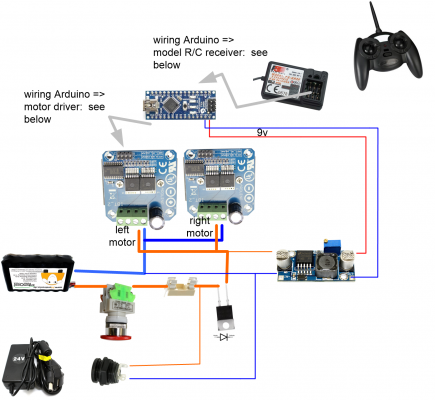
Connect the components as shown below. The emergency switch is to switch on and off the battery. The fuse holder will hold the 4A fuse. The diode is used to get down the battery voltage by at least 0.5 volt so the overvoltage protection of the BTS7960 motor drivers to not take place when the battery is fully charged. The DC/DC converter converts the Ardumower Power Pack battery 24v down to 9v for the Arduino voltage input. The motor drivers control the motors via the Arduino Nano. The signal of two model R/C receiver channels are sent to the Arduino allowing the user to steer the mower and to control the speed. The charging socket is used to connect the Ardumower charger for charging the battery.
Connect your left BTS7960 motor driver to these Arduino pins:
left BTS7960   Arduino pin
GND            GND
VCC            +5V
R_EN           A1
L_EN           A0
R_PWM          9
L_PWM          10
Connect your right BTS7960 motor driver to these Arduino pins:
right BTS7960   Arduino pin
GND             GND
VCC             +5V
R_EN            A3
L_EN            A2
R_PWM           3
L_PWM           11
Connect your model R/C receiver to these Arduino pins:
model R/C channel   Arduino pin
GND                 GND
VCC                 +5V
CH_Steering         5
CH_Speed            6
Arduino code upload
Finally, upload this code to your Arduino Nano:
https://github.com/Ardumower/ardumower/blob/master/code/tests/rcmower/rcmower.ino
