AzuritBer ESP32 option (English): Unterschied zwischen den Versionen
(→Firmware Upload) |
(→Firmware Upload) |
||
| Zeile 34: | Zeile 34: | ||
Open your Arduino Ide 1.8 or later | Open your Arduino Ide 1.8 or later | ||
| − | Select ESP32 DEV Module and correct COM port | + | Select ESP32 DEV Module and correct COM port ( Image 1 and 2 ) |
'''do not forget to change the partition scheme (See Image 3 )''' | '''do not forget to change the partition scheme (See Image 3 )''' | ||
Aktuelle Version vom 1. Mai 2022, 08:46 Uhr
Description
This option require that you have WIFI on your mowing area using for example a outdoor WIFI repeater on your roof.
Bluetooth is limited to only 10/20 meter in free view, but with this option you can use PFOD APP over WIFI inside your house and control mower at long distance. You can also control the mower using Home Automation from your browser, but need a Mosquito broker running on a machine in your lan.
Hardware is the PCB1.3 / 1.4 and the standard HC05 BT module is replace by an ESP32 one .
A special firmware is upload inside ESP32 to manage WIFI connection to PFODAPP and the MQTT protocol if you want to use with home automation.
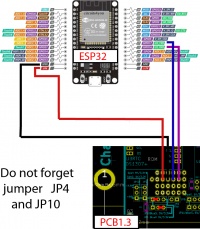
Wiring diagram:
Firmware Upload
Code is locate into github: https://github.com/Boilevin/AzuritBer/tree/master/ESP32_RFID_mqtt
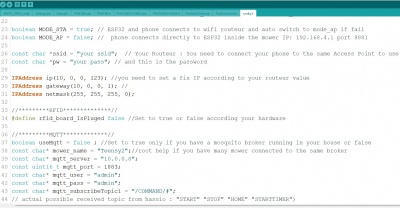
Into config.h you have to adjust some line.Everything is explain in the code ,so simply read and adjust according your config.
Do not forget to set this line to false if RFID PCB is not connected:
#define rfid_board_IsPluged false //Set to true or false according your hardware
To upload code into ESP32, You can use Arduino IDE , It's easy and exactly same process that for Arduino DUE or Mega ,but need to select the correct board.
Add the ESP32 board to your arduino IDE: for more info see : https://randomnerdtutorials.com/installing-the-esp32-board-in-arduino-ide-windows-instructions/#:~:text=%20To%20install%20the%20ESP32%20board%20in%20your,button%20for%20the%20%E2%80%9C%20ESP32%20by...%20More%20
Open your Arduino Ide 1.8 or later
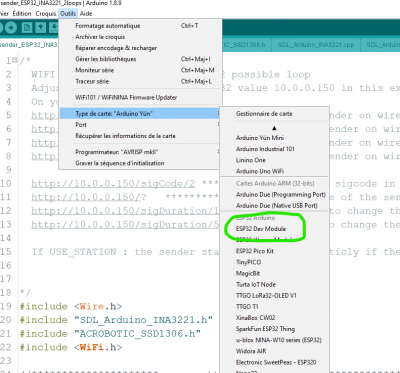
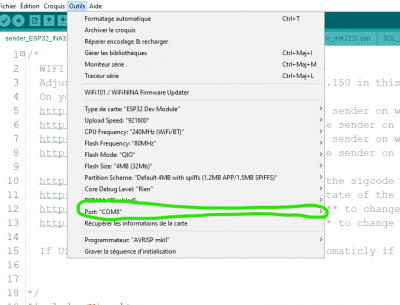
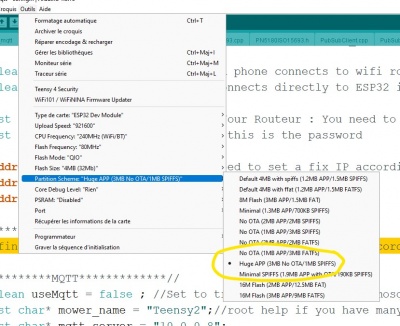
Select ESP32 DEV Module and correct COM port ( Image 1 and 2 )
do not forget to change the partition scheme (See Image 3 )
App is too big for standard ide setting.
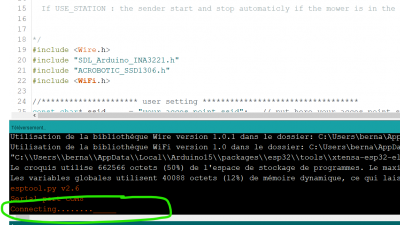
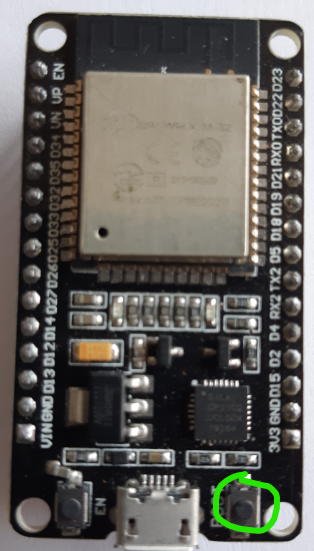
When you upload code : At the end of compilation when you see "connecting ....." --> push the BOOT button locate on ESP32 DEV KIT for 5 sec until uploading begin.
PFOD ARDUREMOTE CONNECTION
ARDUREMOTE actually support only Bluetooth connection , so use BT to connect to mower.
First you need to connect your Phone or tablet to correct WIFI point.If mower can't find your home wifi on startup it change to AP mode , so you can see in your WIFI list a new apparel named ROBOMOWER ,Try to connect to it without password, else if you use the station mode ,simply connect your phone to your router .
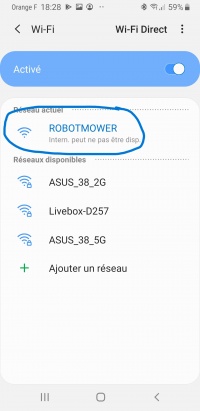 Mower is the ACCES POINT ,No connection with your home network. Mower IP address is 192.168.4.1
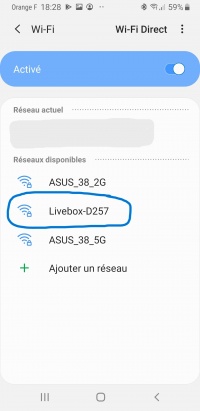 Mower is connected to your home network. Mower IP address is the one you set in config.h
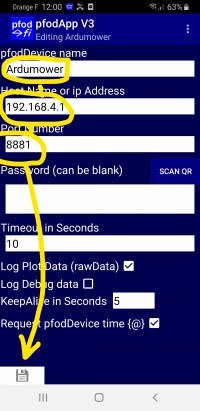
In Pfod app you need to set the correct IP and Port according the value you have in ESP32 firmware config.h.
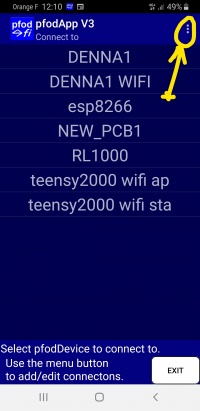
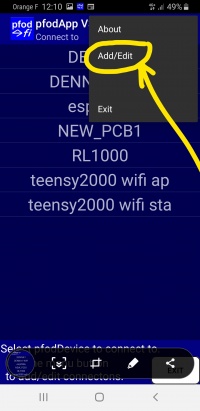
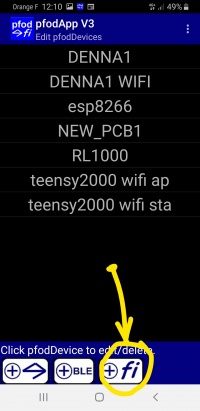
Start Pfod and simply follow these picture:
Pfod App name is what you want.In this picture IP adress: 192.168.4.1 is the mower ACCES POINT one.
After saving and go back ,Simply select the Pfod App name in Pfodapp connect menu.
