AzuritBer Pi Firmware (English)
Inhaltsverzeichnis
- 1 Level 2 Raspberry Pi
- 1.1 Setup
- 1.2 Piardu Configuration
- 1.3 Piardu Power ON / OFF video
- 1.4 Piardu Description
Level 2 Raspberry Pi
A Raspberry Pi is connected over Due Native USB to the arduino
It is used to control Mower over WIFI from everywhere using PC,Tablet,Smartphone etc.....
All movement and message are saved on SDcard for each mowing run and you can check later exactly what append (Bump,Sonar,Perimeter trig etc....)
Setup
What you need
1 Raspberry PI 3B+ or PI4 (The Pizero W can work but very slowly and it's not the goal).
1 DC/DC voltage regulator to power the PI.Minumum 5A version from marotronics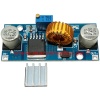 https://www.marotronics.de/5A-DC-DC-step-down-module-XL4015-with-heat-sink-eg-for-Arduino
Connect P17 to input of the DC/DC voltage regulator and connect a micro usb cable to output ![]() (ADJUST the output voltage to 5V before plug the PI)
(ADJUST the output voltage to 5V before plug the PI)
1 USB mouse,keyboard for setting.You can simply use a standard one for the setting and disconnect it after But it's also possible to use a small one like that to drive the mower remotely in manual mode.
1 PowerBank or DC/DC voltage regulator connected to PCB1.3 or power supply for the raspberry pi minimum 3A
1 HDMI cable to see the PI desktop on your TV or HDMI Screen.
1 TV or monitor with HDMI input to easily see the raspberry IP adress on the first boot.
Fast setup for Advanced user
If you already know how raspberry PI work with desktop ,You can read setup process locate into github under Txt File Setup_raspberry.rtf
Here the full setup process:
VNC is installed and you have copied all Piardumower data into Documents folder.
sudo apt-get install idle3
sudo pip3 install paho-mqtt
sudo apt-get install kst
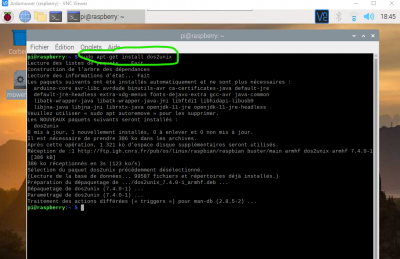
sudo apt-get install dos2unix
Download and Install Arduino IDE and add Due board if you want to flash Due over WIFI
cd ~/Documents
sudo chown -R pi:pi PiArdumower
sudo chmod -R 755 PiArdumower
cd PiArdumower
mv mower.sh /home/pi/Desktop
cd ~/Documents/PiArdumower
dos2unix streamVideo320.py
dos2unix streamVideo640.py
dos2unix DueFlash.py
dos2unix PowerOff.py
dos2unix Restart.py
dos2unix testnet1.py
cd ~/Desktop
dos2unix mower.sh
If you never work with Raspberry simply follow the full WIKI and check all screen copy.
Build the SD Card
You need to first write the raspbian OS on the SD Card .
It's easy using the main raspberry.org site.
You can connect you Micro SD CARD to your laptop or PC using correct adaptor
No need to format at the point but All Data present on it will be destroyed.
Connect to : https://www.raspberrypi.org/
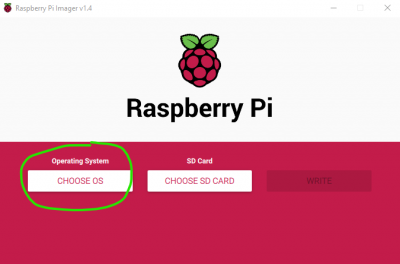
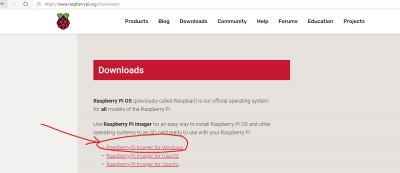 Select Raspberry Pi Imager for Windows
Wait until the download is finish and launch the downloaded prog.
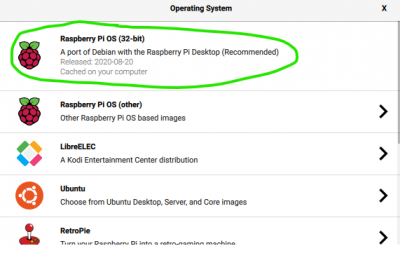 Use the recommended one with Desktop
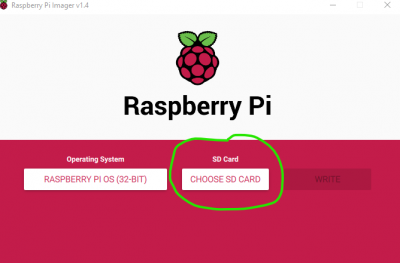
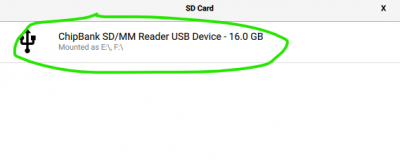 Select your SD CARD Be careful to select the correct one.
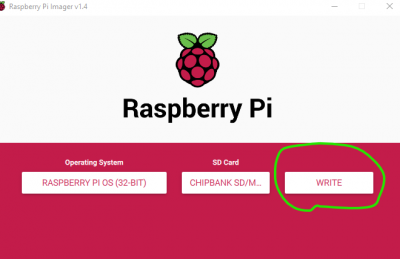 Select Write and wait until down (can take 15 to 60 Min according your internet speed).
Remove the SD CARD for your PC.
PI Initial boot with Desktop
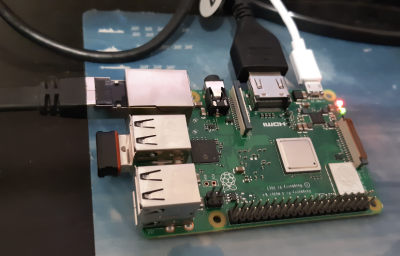
Connect everything on the PI ; Here the Ethernet cable is used but it's also possible to use WIFI
USB Dongle for mouse.
HDMI cable from PI to TV or monitor. (Without TV or monitor is also possible : Search on Google and Youtube)
Ethernet cable if possible or WIFI (On first boot the PI need a good connection to the net for last update)
Power (5V if you use DC/DC voltage regulator) on Micro USB
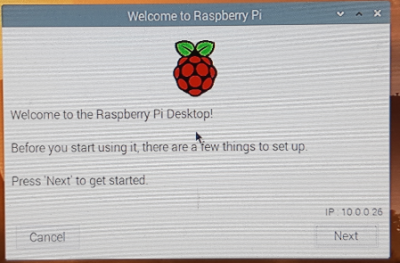
On first start you can see expand sd card,reboot and welcome message with the IP Address for Ethernet
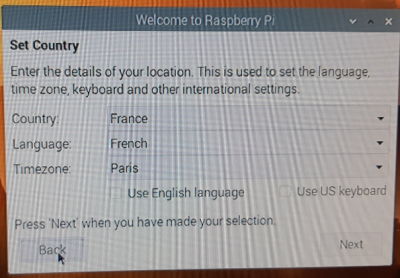
Select your language and location.
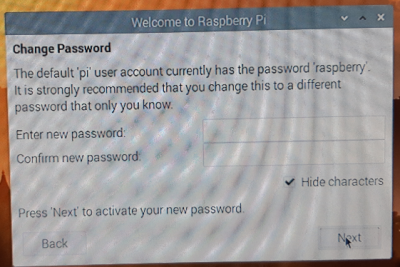
Change password and remember it (we need it later to connect to PI over wifi) For easy wiki : Pass001 but use another one
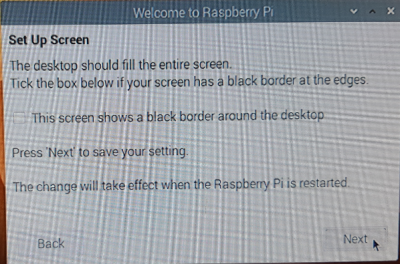
Setup screen, simply click next
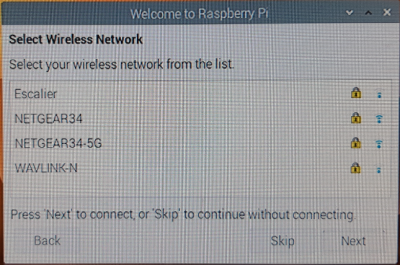
On the WIFI connecting page select the WIFI network that you want to use for all the setting duration (You can change it later for an outdoor one)
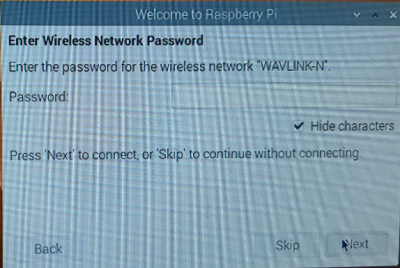
Enter your wifi password and follow the next update step (can take again 10 to 30 minutes)
REBOOT.
We need to activate VNC serveur to whare the desktop with your PC.
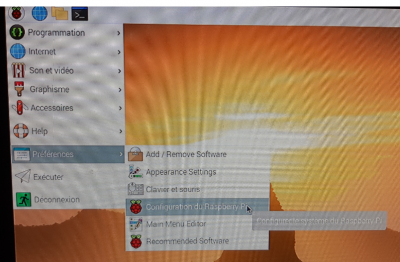
Using Start icon : Go to Préférence and Configuration du Raspberry
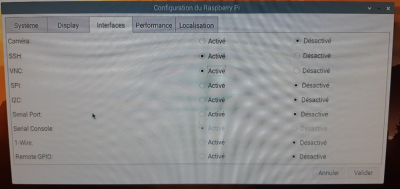
In the Tab Interfaces Activate SSH and VNC
Now on the upper right corner of the desktop a new icon show that VNC Serveur is running .
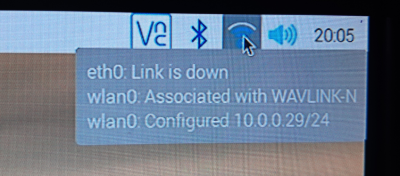
Move your mouse on the Ethernet or Wifi icon to see the IP adress of the ethernet and WIFI one.
The WIFI one is the most important (Here 10.0.0.29)
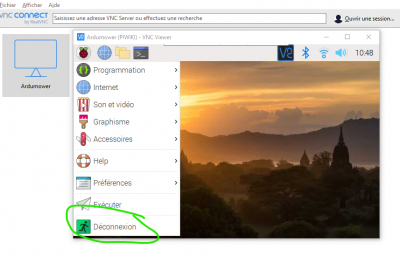
Disconnect the ethernet cable and Reboot (Not Shutdown) All Using Start icon and Log Out.
First Remote PC connection over Wifi
PI SIDE
Pi is running and you can see the desktop
PC SIDE or Tablet / Phone
Remember that we set the Password to Pass001 and ip adress of the PI WIFI is 10.0.0.29
NOW WE WORK ON PC OR TABLET
You have many possiblity (SSH viewer, MobaXterm, Remote Desktop etc...) , In this case I use free real VNC Viewer (Not VNC Serveur) to connect to the PI over your network.
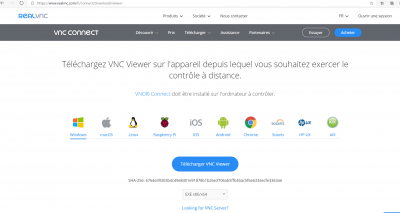
Go to https://www.realvnc.com/fr/connect/download/viewer/
And select the correct donwload according your platform.
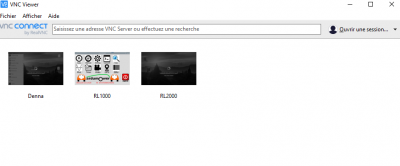
Instal the software and start it (VNC Viewer). In your case the tab is empty (No RL1000,Denna etc....)
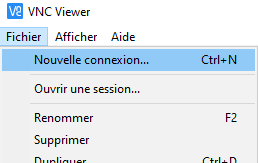
On upper left choose File / New Connection
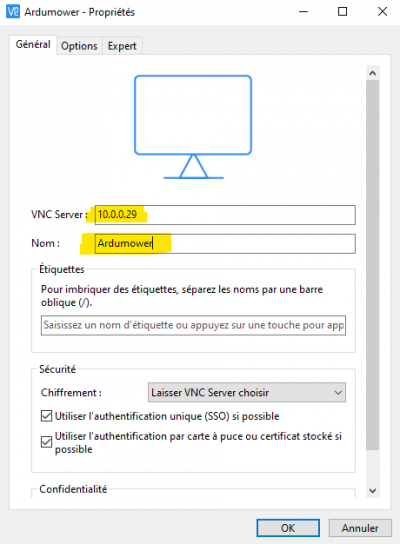
Into VNC Serveur : enter the IP of the raspberry (ethernet or WIFI adress) and give a name to the connection.
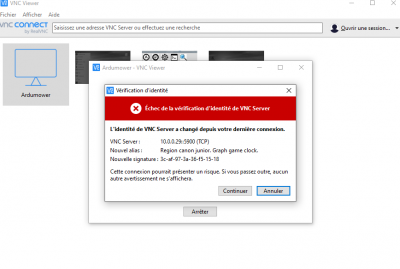
It's possible that a new security box is shown on the screen Select Continue
You can see the new Connection named Ardumower Double click on it.
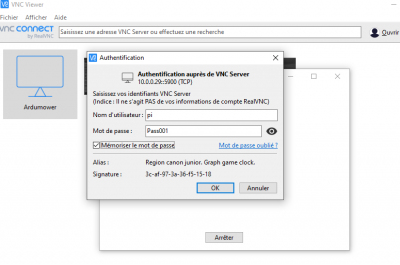
UserName is pi and password is Pass001 or the one you choose on first start part.Check remember password
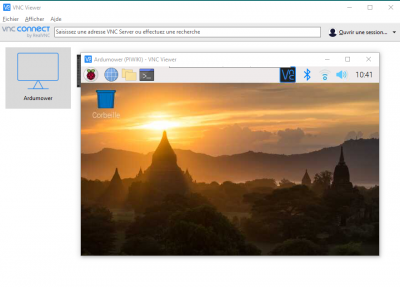
The Clone of the Pi desktop is now on your PC and you can do everything exactly like if you use localy the raspberry ,But from your Sofa
Pi Software part
NOW WE WORK ON THE PI USING VNC VIEWER ALL COMMAND NEED TO RESPECT THE CASE
DO NOT DISCONNECT THE SCREEN TO HAVE A CORRECT RESOLUTION (1024*768)
You need to send some command to the PI Terminal to install some software.
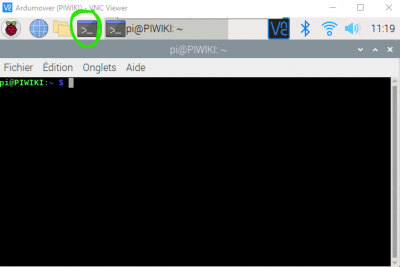
To see the terminal click on the >_ icon in the taskbar
Copy and past all the following command in the terminal after the $ for the rest of this wiki part
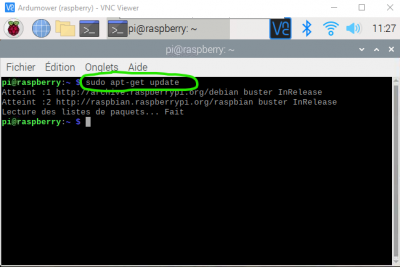
sudo apt-get update
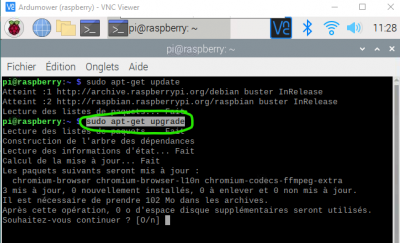
sudo apt-get upgrade
This download can take a lot of time , so be patient and answer Yes to upgrade
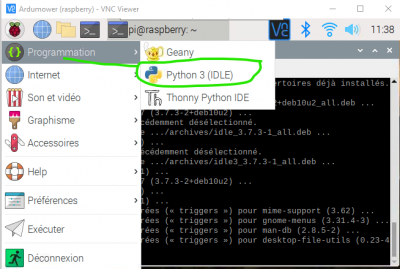
Python3 Idle
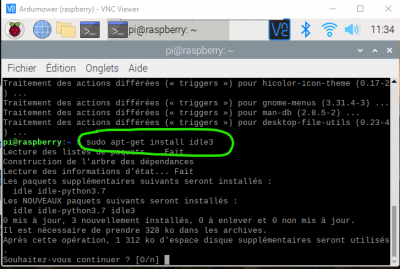
Piardu.py use Python3 , so we need to install the idle to have access to it and edit if needed (answer Yes for installing)
sudo apt-get install idle3
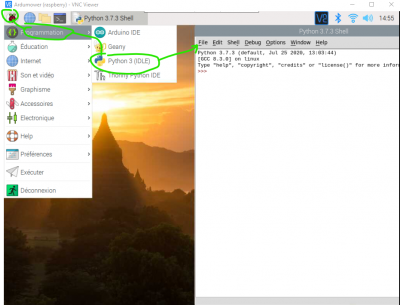
At the end of the Python idle installation you need to have a new icon into Start / Programing menu.
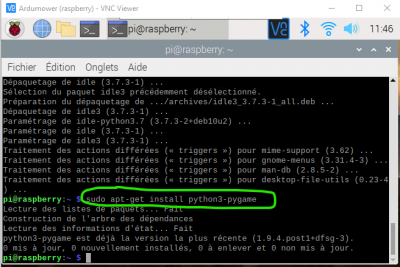
Pygame
It's possible to drive the mower in Manual mode with PS4 joystick but need pygame software (Maybe already include but it's better to do it)
sudo apt-get install python3-pygame
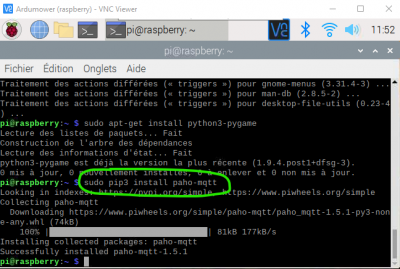
Paho Mqtt
It's possible to controle mower over mqtt and use Home Automation but need python3 paho software part.
sudo pip3 install paho-mqtt
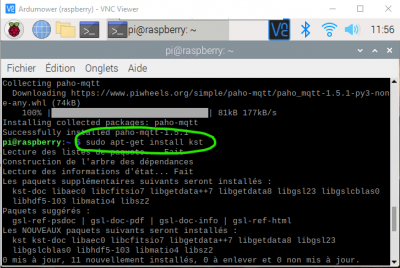
KST Plot
Piardu use software named KST to plot all the data
Seach KST Plot on Google for more info . Again copy and past this into the Pi terminal:
sudo apt-get install kst
DosToUnix
Some file need to be in unix format ,so a conversion is needed using DosToUnix
sudo apt-get install dos2unix
Arduino IDE
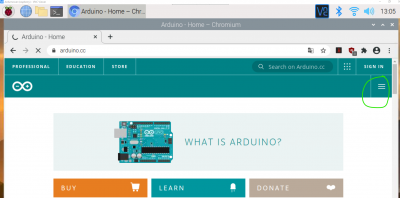
It's possible to update the due firmware from Piardu over WIFI but need the ARDUINO IDE in the raspberry.
The process is describe perfectly in this video
https://www.youtube.com/watch?v=ySyBNdndB58
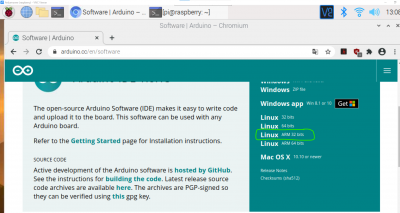
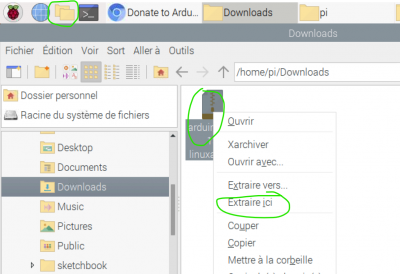
Here screenshot of the 07/11/2020 download page for Arduino 1.8.13 version : Choose Linux ARM 32 bits
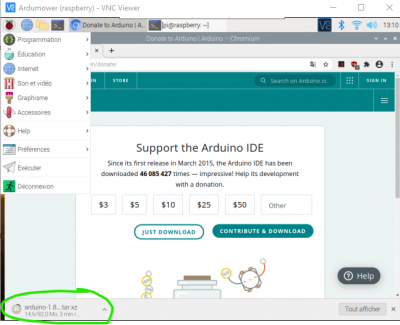
Go to file manager home / pi / Downloads and right click to the downloaded file ,select extract here (WAIT before you see something appear)
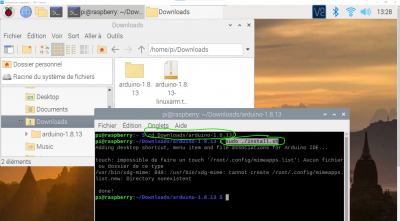
Now open again the terminal windows (>_ icon on upper left) and copy these command (it can take time)
cd Downloads/arduino-1.8.13
sudo ./install.sh
Do not take care about the error message.
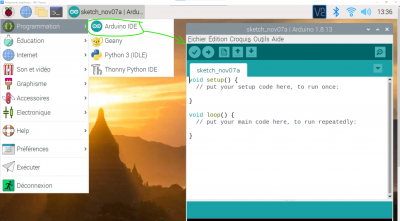
You can see now the arduino icon into start / programming, start the prog to be sure everything is OK.
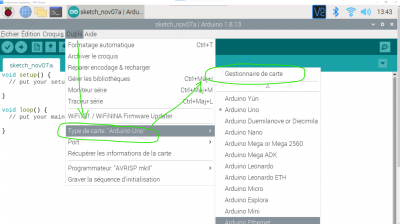
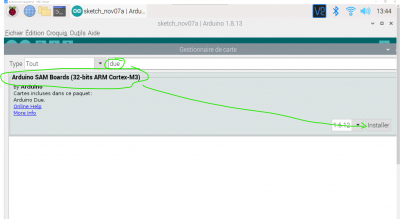
Add the ARDUINO DUE in the board list
Search for DUE : and select arduino SAM Boards
Again it can take time,so Wait until process finish.
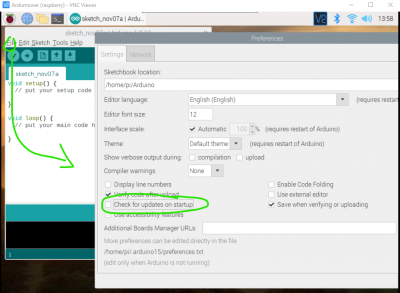
Normaly arduino ide is not use and only a command line is used to update Due firmware but to be sure the folder name stay always the same : Go to file Preferences and deactivate the Search for update.
PiArdu Software
You need to copy all the Github file locate into Piardumower folder inside the Raspberry PI home/pi/Documents folder.
Using VNC Viewer :
First initiate the correct location for file transfert
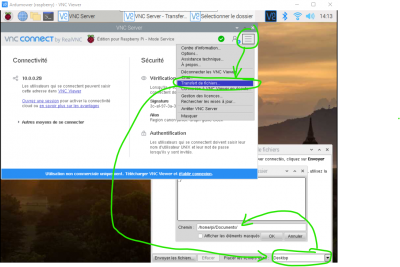
Click VNC Serveur icon on desktop upper right near Bluetooth icon
Click Menu icon on VNC CONNECT upper right page
Select File Transfert in the menu list
In bottom right of the next page select other folder and choose home/pi/Documents.
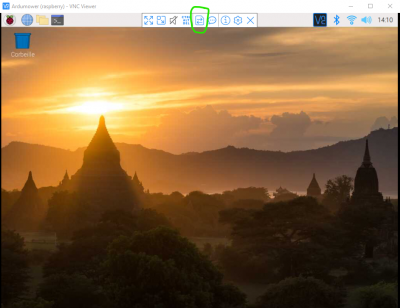
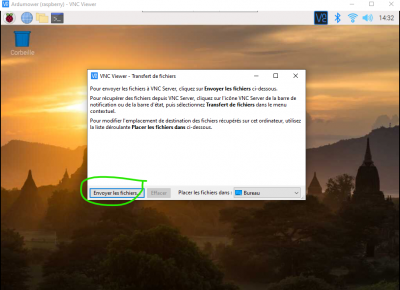
Now download all the file: Move your mouse in upper middle of the desktop to see the VNC transfert icon and select it Click on send file
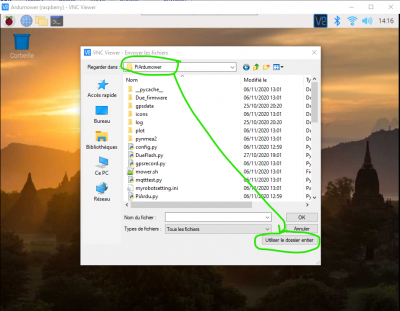
Navigate into your PC to find the github master downloaded file and select piardumower and validate using the FULL FOLDER in bottom right
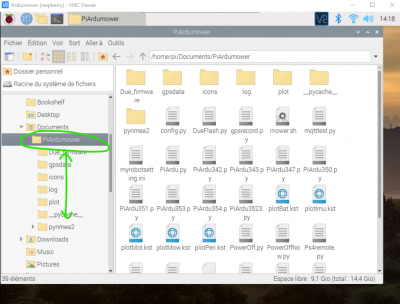
If everything is OK you can see now the entire folder correctly locate in home/pi/Documents
Set permission to everyone for all the piardumower file
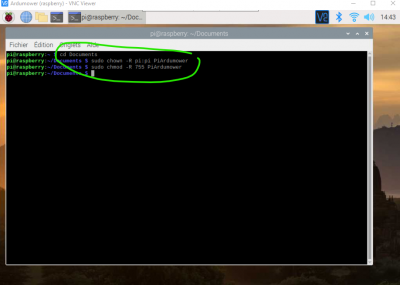
Open a terminal (>_ icon ondesktop) and send the 5 command
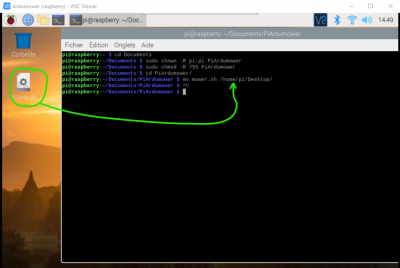
cd Documents
sudo chown -R pi:pi PiArdumower
sudo chmod -R 755 PiArdumower
Add start Piardu.py to desktop using a shell command:
cd PiArdumower
mv mower.sh /home/pi/Desktop
A new file is now present on desktop Mower.sh and can be use to start the Piardu.py
Change into config.py for the first start of Piardu (Deactivate momentary the DUE serial link to avoid error)
Start / Programming / Python3 IDLE
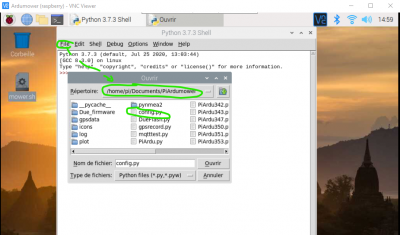
And into Python Shell select File Open home/pi/Documents/Piardumower/config.py
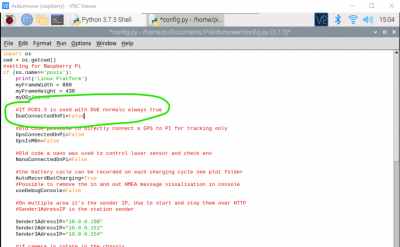
Now change DueconnectedOnPi from True to False
Save and close the config.py file but keep the shell open
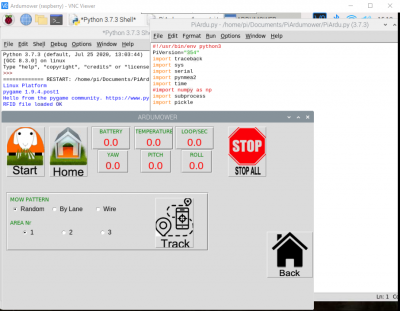
Now from Python Shell select File Open home/pi/Documents/Piardumower/PiArdu.py and click on Run / Run Module or hit F5
Piardu need to start without error into Shell windows (No red Line)
And you can navigate inside all the menu with a fast response.
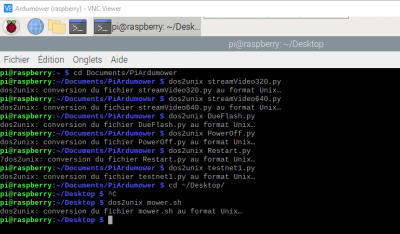
To work correctly some file need to be converted into Unix format:
Open the terminal and copy these command
cd Documents/PiArdumower
dos2unix streamVideo320.py
dos2unix streamVideo640.py
dos2unix DueFlash.py
dos2unix PowerOff.py
dos2unix Restart.py
dos2unix testnet1.py
cd ~/Desktop
dos2unix mower.sh
DUE Connection
If You can't remove the DUE from PCB1.3 ,it's not a problem but you need to power the raspberry using the DC/DC voltage regulator under the same battery
![]() FIRST ADJUST THE DC/DC TO 5V OUTPUT or you are going to destroy the raspberry
FIRST ADJUST THE DC/DC TO 5V OUTPUT or you are going to destroy the raspberry
From PCB1.3 24V P17 -->IN DC/DC OUT--> 5V micro USB Raspberry PI
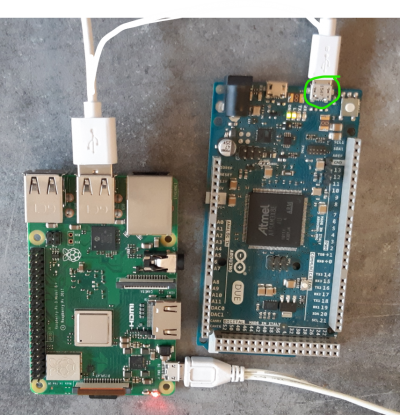
You can also connect Arduino Due without the PCB1.3 to PI using USB Cable Never use a charging cable only DATA cable (DUE is powered by the raspberry ,so it's very easy)
Change again into config.py to activate the DUE serial link.
Start / Programming / Python3 IDLE
And into Python Shell select File Open home/pi/Documents/Piardumower/config.py
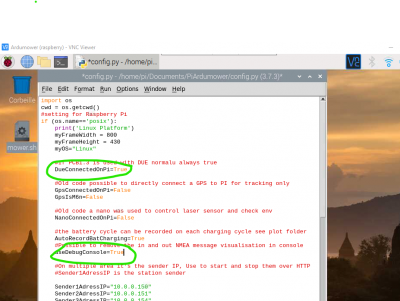
Change DueconnectonPi from False to True
Also set UseDebugConsole to True
Save and close the config.py file but keep the shell open
Now from Python Shell select File Open home/pi/Documents/Piardumower/PiArdu.py and click on Run / Run Module or hit F5
Piardu need to start and you can navigate inside all the menu very slowly if there are no firmware in the arduino DUE so wait
![]() If Raspberry is powered using PCB1.3 JUMPER JP8 NEED TO BE IN ALWAYS ON POSITION
if you forget to change JP8 position. During the DUE flash, PCB can power off raspberry . In this case you need to upload again the sketch from your PC using DUE programming port
If Raspberry is powered using PCB1.3 JUMPER JP8 NEED TO BE IN ALWAYS ON POSITION
if you forget to change JP8 position. During the DUE flash, PCB can power off raspberry . In this case you need to upload again the sketch from your PC using DUE programming port
On PiArdu click Back icon and Setting icon
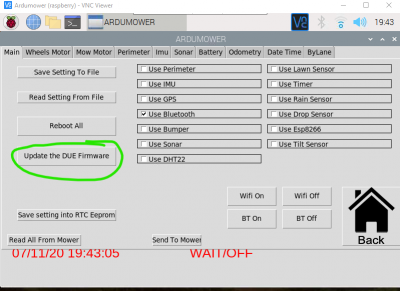
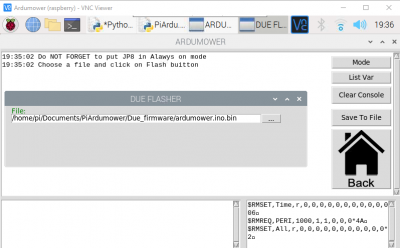
On setting main tab use Update the DUE Firmware button and click on Start Flash. Never use "(" or ")" in the mane of file or the flash crash.
Wait until DUE FLASHER window is closed
Again click Back icon and Setting icon and click on Reboot All
The Raspberry and DUE reboot
if you use the PCB1.3 maybe you need to activate raspberryPi use to YES into arduremote / Setting / Raspberry.
Automatic start on Power up:
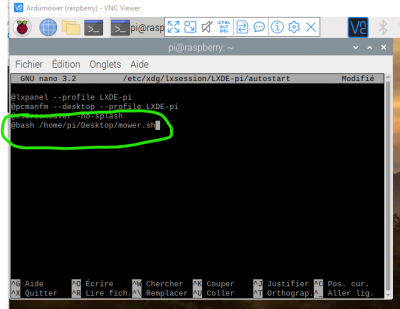
In terminal use text editor named nano to start mower.sh each time the Pi is power up
sudo nano /etc/xdg/lxsession/LXDE-pi/autostart
and at the end of the file add the line below ,Be careful mouse don't work inside the editor,so paste the line at the correct location , error in this file can corrupt the PI starting process
@bash /home/pi/Desktop/mower.sh
Use Ctrl X to exit and save the change in autostart.
Reboot the PI ,Normally Piardu automatically start with some error if DUE is not plug in PCB1.3 or without error if PCB1.3 is used.
If you can't see the bottom red line with date time : check if you have activate raspberryPi to YES using Arduremote / Setting /raspberry
Go to Piardu auto page and click on OFF to reset all eventual error.
Optional Screen
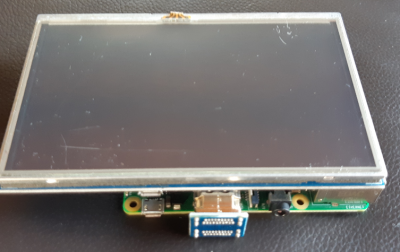
For really easy working it's better to use a tactile screen ,directly connected on the Raspberry.
Piardu is write to use a 800*480 5 inch screen using HDMI connection.Avoid SPI screen because the processor can't manage everything faster.
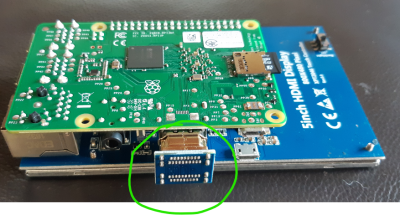
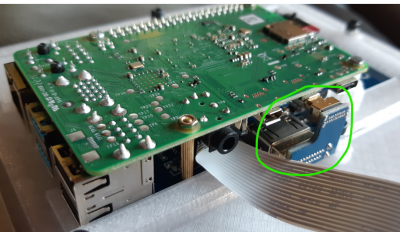
Be carreful when you order : HDMI adaptor is not the same for PI4 (Right Picture) and PI3B+ (center and left Picture)
To setup the tactile and screen :
Go to terminal :copy and paste these command
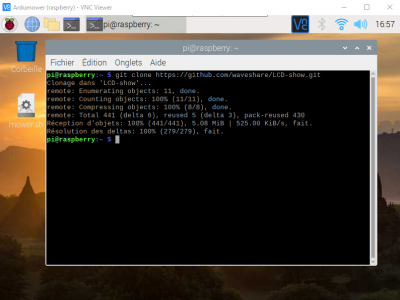
git clone https://github.com/waveshare/LCD-show.git
cd LCD-show/
sudo ./LCD5-show
Wait and after reboot ,Resolution is automaticaly reset to screen one and tactile is working to control PiArdu.
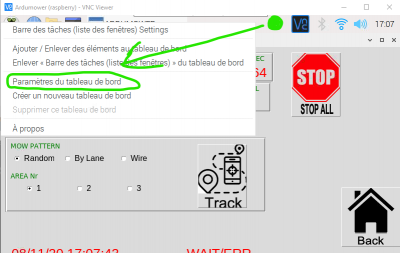
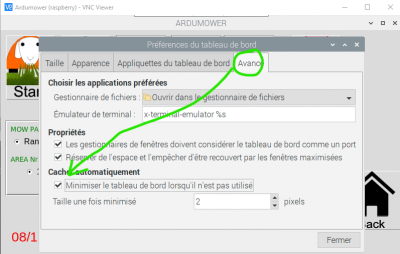
To have PiArdu on total full Screen Right Click in the TaskBar near VNC SERVEUR to open a menu list and select 'Parameter tab de bord' (See picture from translation)
On the new windows select tab Advance and check Minimise (Again See picture from translation)
Optional Camera
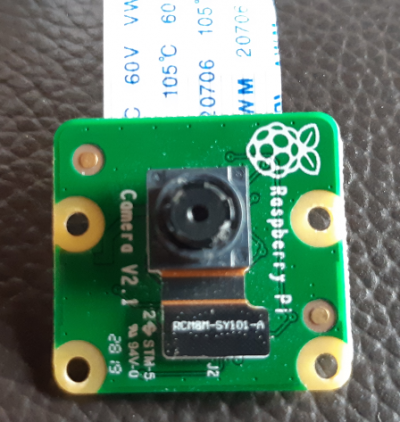
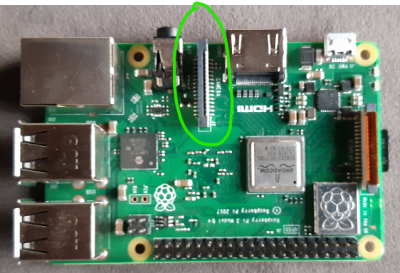
Simply connect the camera to PI CSI port
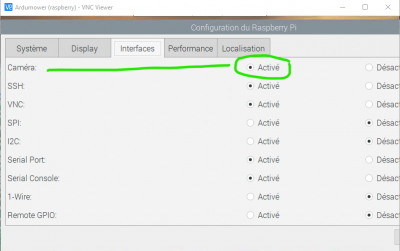
Using Start icon : Go to Préférence and Configuration du Raspberry
In the new windows go into tab Interfaces
Check to Enable the Camera
Move windows or Hit Tabulation 10 times because you can't see Validate Button and press Enter (Reboot)
Piardu Configuration
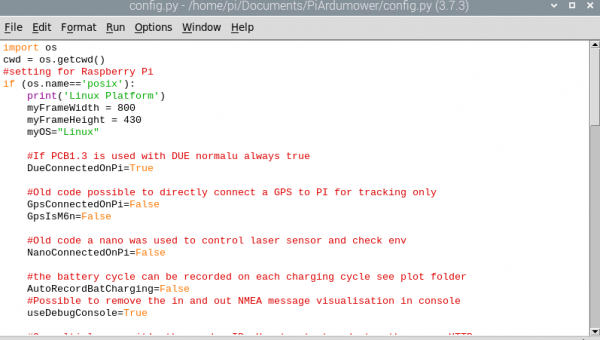
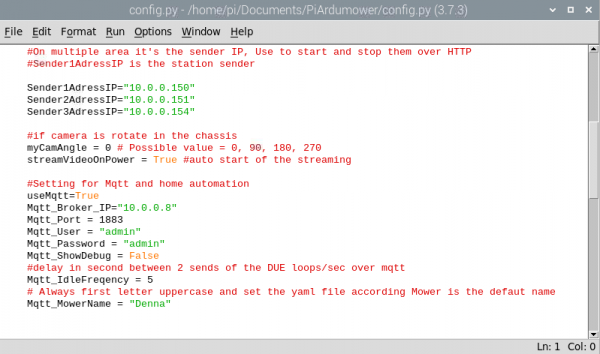
Inside folder : home/pi/Documents/Piardumower you can edit the config.py file to manage different option :
PCB part:
Due ConnectedOnPi True for normal use , False to test Raspberry without PCB1.3 and DUE
GPS part:
Warning : GPS is not use by software,it's only a tracker version, All data are recorded and saved inside Piardumower/Gpsdata
GpsConnectedOnPi True or False : Old config with GPS directly connected on Raspberry Pi Serial GPIO.
GpsIsM6n True or False : Set to false is you use M8N module because NMEA sentence are not the same
Arduino Nano part.
NanoConnectedOnPi
It's possible to connect Arduino Nano on Pi USB to receive data and react according, It was build to test some laser beam VL53L0X sensor and rain sensor but without success
Battery part:
AutoRecordBatCharging
When charging start it's possible to record each minute voltage and battery sense to check later how everything work and adjust the max charging duration if necessary.
Debug part:
UseDebugConsole
If True ,you can see more message in the console page including all NMEA sentence received and send by Raspberry.
Sender part:
Sender1AdressIP Sender2AdressIP Sender3AdressIP
If you use the RFID option with multiple area it's the IP adress that Piardu use to communicate with other sender over WIFI.
Camera part:
myCamAngle
If camera in mount in particular orientation it's possible to adjust screen render here.
streamVideoOnPower
if set to True the video stream automatically start when pi is power up
Piardu Power ON / OFF video
Result after everything correctly set :
Power ON
https://youtu.be/Qhv8r2bD_Bk
Power OFF
https://youtu.be/4YJQ-zyLq-Q
Piardu Description
It's here : [[1]]

