AzuritBer Firmware (English): Unterschied zwischen den Versionen
(→Odometry Setting) |
(→Odometry Setting) |
||
| Zeile 84: | Zeile 84: | ||
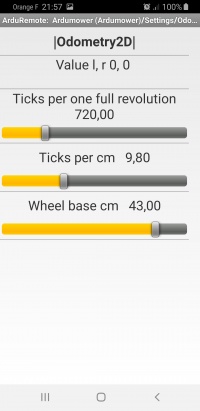
Go To : ''Main Menu / Setting / Odometry'' | Go To : ''Main Menu / Setting / Odometry'' | ||
| + | [[Datei:ArduRemote_Setting_Odometry.jpg|200px]] | ||
You need to set the correct ticks per one full revolution and check the result | You need to set the correct ticks per one full revolution and check the result | ||
Version vom 31. Oktober 2020, 11:36 Uhr
Inhaltsverzeichnis
Test requirements
![]() Security note: For security reasons, always remove mower blades in your first tests!
Security note: For security reasons, always remove mower blades in your first tests!
![]() Important: For your first wheel motor tests, jack your robot so that the tires can run freely without ground contact!
Important: For your first wheel motor tests, jack your robot so that the tires can run freely without ground contact!
Prerequise to follow this WIKI: BT Module connected on PCB1.3 (ESP32 is also possible) and Pfod or Arduremote running into Android phone
What is AzuritBer and Why
AzuritBer was build for DENNA,ROBOMOW and PARANELLO platform and use Odometry or IMU to control the state change. It can only run on DUE and Odometry is mandatory (minimum 400 ticks per rev).But it's possible to adjust setting to work on other platform.
This version always use odometry into all movement (reverse,roll etc...) .The result is a more smooth movement without pause between all the différents state and the possibility to mow by lane for big area and faster mowing
2 Usefull option are Raspberry PI and RFID module.
At the beginning of the dev i need many debug message to perfectly adjust the firmware, so i add a raspberry and record all the mowing duration in a Console. Actually PI is optional, but help a lot to find trouble in the behaviour and to communicate (With your PC,or home automation) Other option is the RFID tag reader
Possible Option
Level 1 Standard
It's Azurit with ByLane and Wire mowing but without Raspberry and RFID
The mower can run in full automatic mode but can't manage multiple distinct mowing area.
Start using timer at different location on the perimeter wire with 3 possible mowing behaviour: Mow wire,Random Mode or By Lane Mode
Acces to mower using Arduremote or Pfod over Bluetooth
Level 2 Raspberry
The platform And Raspberry Pi but no RFID
It's Level 1 but now:
It's possible to acces to mower from your Wifi and set everything from your Sofa (Including firmware upgrade)
Home Automation can control the mower using MQTT message and start mowing according your automation.
Level 3 Raspberry + Rfid reader
The platform And Raspberry Pi and RFID reader and at least 1 Wifi sender.
It's level 2 but now:
You can setup 3 distinct mowing area
The fast return to station, easy escape from island, and change speed while tracking are now possible.
First start Level 1
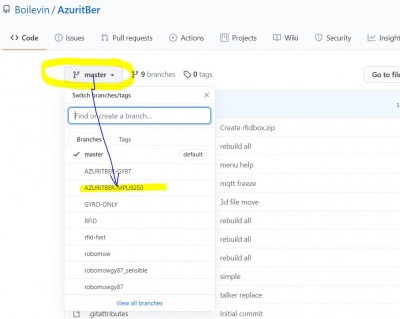
If you want to use IMU ,Be careful to choose the correct firmware from Github (GY-88,GY-87 and MPU-9250 are possible)
After unzip the github repository ,open the ardumower folder and the ardumower.ino. Before uploading the sketch ,verify that into mower.h the line :
*          #define Console Serial
*          //#define Console SerialUSB
are set like that : uncomment #define Console Serial to receive Console message inside the arduino ide console and comment #define Console SerialUSB
Upload the sketch inside the DUE using programming port.
Normally if everything is OK you have access to arduremote and setting.
Only For the first start, or with a new RTC eeprom :If you have error, you need to go into arduremote COMMAND and click on OFF to reset all error,next into setting, do a save setting.
Power OFF the PCB , do not forget also to disconnected the USB PC cable to be sure all restart correctly.
Restart with PC connected on Due programming Port and the console speed is set at 115200 bps .
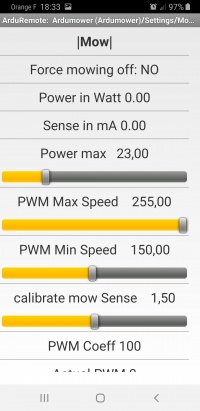
****** SAFETY ****** Go To : Main Menu / Setting / Mow Motor
Set Force mowing off to YES
Odometry Setting
3 Values are require and need to be set in this order:
Value 1
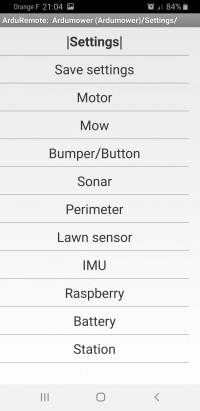
Go To : Main Menu / Setting / Odometry
You need to set the correct ticks per one full revolution and check the result
Go To : Main Menu / Test ODO
Use 1 turn Wheel FWD
The wheel need to accelerate ,roll , brake and stop after exactly one revolution.
Repeat the test with 5 turn Wheel FWD to be sure.
Value 2
Back To : Main Menu / Setting / Odometry
Now you need to set the correct Ticks per cm according the diameter of the wheel.
you can find the value by this formula: Ticks per one full revolution / PI*diameter of the wheel
In this example the DENNA platform (diameter wheel is near 23 cm) : 720/3.1415*23=9.9
Back To : Main Menu / Test ODO
Now use the 3 meters Forward command to see if the value is OK.
The mower need to run forward for 3 meters .Adjust the value again if result is not 3 meters +/-10 cm
Value 3
Back To : Main Menu / Setting / Odometry
Now you need to set the correct Wheel Base in cm .
It's the distance between the 2 wheels. It is use to compute correctly all the mower roll movement.
Back To : Main Menu / Test ODO
Now use the Rotate 180 Deg and Rotate 360 Deg to verify the setting.Adjust the value again if result is not at +/- 5 Deg.
Mower need to rotate according your choice.Change the Wheel Base in cm until you find 180 and 360 degrees
Motor Setting
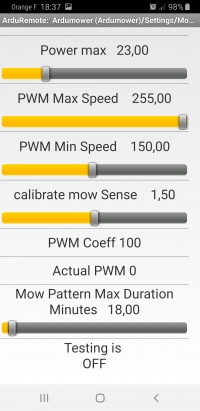
Go To : Main Menu / Setting / Motor
First set the POWER MAX to 100 to be sure the motor don't stop.
Adjust the RPM max speed and PWM max speed:
RPM is use into manual mode, so to check a new value simply go to Main Menu / Manual and drive forward.
You need to stop and drive forward again each time you change the RPM max speed slider value.
PWM is use into automatic mode and need to be enough for the mower to reach the RPM max value.
If the wheel don't roll smoothly in manual forward ,maybe you need to adjust the RPM_P RPM_I and RPM_D
See PID Control : [1]
Always start with RPM_D=0 and move the 2 sliders RPM_P and RPM_I. RPM_P increase the changing speed and RPM_I smooth the speed when near the RPM max speed.
You need to find a correct Manual / forward drive before continue with the Power max setting.
Remember that at 80% of the power max the mower react like if a bumper is pressed.
So to find the correct value ,simply deactivate bumper and In Manual / Forward stop the mower with your foot, normally the mower stop before the wheel slip. State change to OFF and into console you can see the according message. Do not forget to reactivate the Bumper.
MotorSenseScaleLeft and right are here to help to have a real Power, but the main is that at 80% of Power max : mower stop and reverse.
Swap Left Direction and right need to stay to NO and it's better to directly invert the motor wire + and -
Mow setting
Go To : Main Menu / Setting / Mow
