Chassis 2021: Unterschied zwischen den Versionen
Aus www.wiki.ardumower.de
BenPan (Diskussion | Beiträge) (→Mowing disc) |
BenPan (Diskussion | Beiträge) (bilder aus videos hinzugefügt) |
||
| Zeile 18: | Zeile 18: | ||
#[https://www.youtube.com/watch?v=s_W-PYmOGCo Ardumower Tutorials Chassis 2021 Teil 3 Montage] | #[https://www.youtube.com/watch?v=s_W-PYmOGCo Ardumower Tutorials Chassis 2021 Teil 3 Montage] | ||
| − | = | + | =Whats inside the Box?= |
| + | |||
| + | <gallery> | ||
| + | File: Chassis2021InsideBox1.png | Plates etc. | ||
| + | File: Chassis2021InsideBox2.png | Electronics, Screws | ||
| + | </gallery> | ||
| + | |||
| + | =Preparation of Plate-Materials= | ||
| + | |||
| + | <gallery> | ||
| + | File: Chassis2021Prepare1.png | parts with sharp burrs | ||
| + | File: Chassis2021Prepare2.png | parts without sharp burrs | ||
| + | File: Chassis2021Prepare3.png | glue the doubled Motor-mounting-plates | ||
| + | </gallery> | ||
| + | |||
| + | ==Front-Plate== | ||
| + | |||
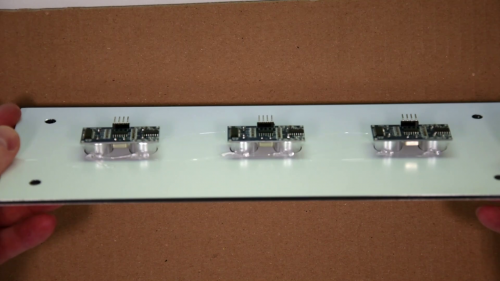
| + | Mount the three Sonar-Sensors with hot-glue (carefully). | ||
| + | |||
| + | [[File:Chassis2021Prepare4.png | 500px]] | ||
| + | |||
| + | ==Mow-Plate== | ||
| + | |||
| + | <gallery> | ||
| + | File: Chassis2021MowPlate1.png | 1 | ||
| + | File: Chassis2021MowPlate2.png | 2 | ||
| + | File: Chassis2021MowPlate3.png | 3 | ||
| + | </gallery> | ||
| + | |||
| + | =Wiring= | ||
| + | |||
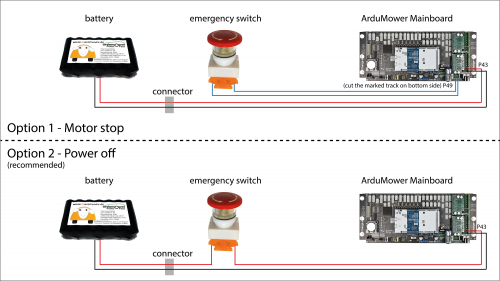
| + | There are two options to wire the emergency switch. | ||
| + | |||
| + | [[File:Chassis2021EmergencyStop.png | 500px]] | ||
| + | |||
| + | |||
| + | =Tools= | ||
| + | |||
==Required Tools== | ==Required Tools== | ||
* Screw driver | * Screw driver | ||
| Zeile 38: | Zeile 75: | ||
=Case assembly= | =Case assembly= | ||
| − | + | <gallery> | |
| − | + | File: Chassis2021Assembly1.png | Arrange parts and drill two holes for bumper cabling (see right hand finger for one of the marks) | |
| − | + | File: Chassis2021Assembly2.png | Mount profiles to baseplate and gear-motors to side walls (with especially marked screws "Motor") | |
| − | + | File: Chassis2021Assembly3.png | Mount profile for mowing motor | |
| − | + | File: Chassis2021Assembly4.png | Install sealing ring | |
| − | + | File: Chassis2021Assembly5.png | install mowing motor | |
| − | + | File: Chassis2021Assembly6.png | mount sidewalls | |
| − | + | File: Chassis2021Assembly7.png | prepare backside | |
| − | + | File: Chassis2021Assembly8.png | install backside | |
| − | + | File: Chassis2021Assembly9.png | prepare bumper | |
| − | + | File: Chassis2021Assembly10.png | start with screws -> washers -> plastic spacer sleeves | |
| + | File: Chassis2021Assembly11.png | add bumper -> washers -> nuts | ||
| + | File: Chassis2021Assembly12.png | finished bumper | ||
| + | File: Chassis2021Assembly13.png | install mowing plate | ||
| + | File: Chassis2021Assembly14.png | install frontplate | ||
| + | File: Chassis2021Assembly15.png | finished case | ||
| + | File: Chassis2021Assembly16.png | install electronics | ||
| + | File: Chassis2021Assembly17.png | final frontplate | ||
| + | File: Chassis2021Assembly18.png | final backplate | ||
| + | File: Chassis2021Assembly19.png | final top view | ||
| + | </gallery> | ||
=Further links= | =Further links= | ||
[https://forum.ardumower.de/threads/aufbau-anleitung-für-das-neue-dibond-chassis-mit-bumper.24067/ instructions on ardumower forum] | [https://forum.ardumower.de/threads/aufbau-anleitung-für-das-neue-dibond-chassis-mit-bumper.24067/ instructions on ardumower forum] | ||
Version vom 20. April 2021, 01:00 Uhr
This page is under construction.
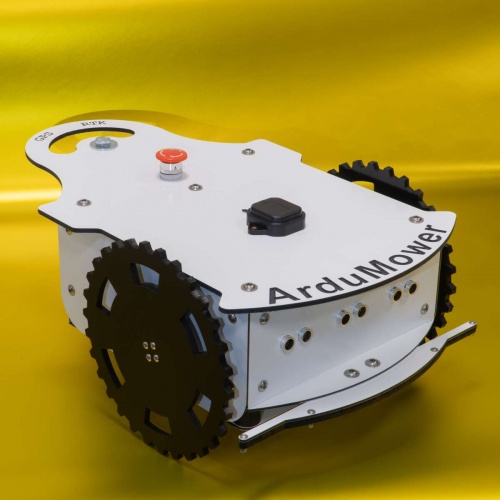
This page describes the assembly of the Ardumower chassis that you can purchase via the shop ![]() .
.
Please start watching the detailed instruction videos on Youtube (see section "Videos"). This page is based on the content of the videos.
Inhaltsverzeichnis
Ardumower Chassis 2021 specifications
Videos
- Ardumower Tutorials Chassis 2021 Teil 1 WasGehoertDazu
- Ardumower Tutorials Chassis 2021 Teil 2 Vorbereitung
- Ardumower Tutorials Chassis 2021 Teil 3 Montage
Whats inside the Box?
Preparation of Plate-Materials
Front-Plate
Mount the three Sonar-Sensors with hot-glue (carefully).
Mow-Plate
Wiring
There are two options to wire the emergency switch.
Tools
Required Tools
- Screw driver
- Different Imbus screw driver
- Different Torx screw driver
- Knife
Optional Tools
- Round and flat file
- Electric padsaw
- Drill machine with drill set (3,4,6,8,10 mm drills)
Optional Material
- M4 washer and spring washer
- 1 M8 carriage bolt
- Rain sensor case 3D print from model
- Case for NTRIP receiver module for GSPS variant of the Ardumower


