Arduino first steps: Unterschied zwischen den Versionen
| Zeile 10: | Zeile 10: | ||
| − | <b>Step 2: Download | + | <b>Step 2: Download</b> |
Click here to download the Arduino development software to your computer (Windows users should download the 'Installer' version on that page): | Click here to download the Arduino development software to your computer (Windows users should download the 'Installer' version on that page): | ||
| Zeile 16: | Zeile 16: | ||
http://arduino.cc/en/Main/Software#toc3 | http://arduino.cc/en/Main/Software#toc3 | ||
| − | <b>Install</b> | + | |
| + | <b>Step 3: Install</b> | ||
After the download completed, install the Arduino development software on your computer: | After the download completed, install the Arduino development software on your computer: | ||
| Zeile 22: | Zeile 23: | ||
| − | <b>Step | + | <b>Step 4: Run</b> |
| − | After the installation completed, run the Arduino development software by double clicking the 'Arduino' symbol on your Windows desktop. | + | After the installation completed, run the Arduino development software on your computer by double clicking the 'Arduino' symbol on your Windows desktop. |
Version vom 24. November 2014, 11:58 Uhr
Step 1: Attach the Arduino to your computer
Using an USB cable, attach the Arduino (Arduino Nano or Arduino Mega) to your computer as shown below.
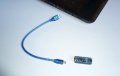
Arduino Nano and USB cable
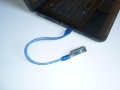
Arduino Nano connected via USB
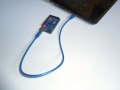
Arduino Mega 2560 connected via USB


Step 2: Download
Click here to download the Arduino development software to your computer (Windows users should download the 'Installer' version on that page):
http://arduino.cc/en/Main/Software#toc3
Step 3: Install
After the download completed, install the Arduino development software on your computer:
For Windows, double click the file 'arduino-1.5.8-windows.exe' in your Windows file explorer.
Step 4: Run
After the installation completed, run the Arduino development software on your computer by double clicking the 'Arduino' symbol on your Windows desktop.