Ardumower Chassis 'mountain mod': Unterschied zwischen den Versionen
(→Videos) |
(→Turning front drive into rear drive) |
||
| Zeile 24: | Zeile 24: | ||
=Turning front drive into rear drive= | =Turning front drive into rear drive= | ||
| − | # swap motor cables (right and | + | # on PCB, swap right motor cables with left motor cables (so left motor is right motor and vice versa) |
| − | # swap odometry cables (right and | + | # on PCB, swap polarity of each motor (so turning forward is turning backward) |
| − | # | + | # on PCB, swap odometry cables (so left odometry is right odometry and vice versa) |
| + | # mount battery charging pin at chassis handle side | ||
# disable ultrasonic sensor | # disable ultrasonic sensor | ||
| − | # move perimeter coil from old front to old back side | + | # move perimeter coil from old front to old back side (if using perimeter sensor) |
# use [https://wiki.ardumower.de/index.php?title=Bumper_sensor BumperDuino] as bumper sensor | # use [https://wiki.ardumower.de/index.php?title=Bumper_sensor BumperDuino] as bumper sensor | ||
Version vom 13. September 2021, 21:29 Uhr
Inhaltsverzeichnis
Abstract


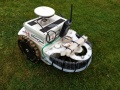
This page describes (as a 'hack') how to modify the Ardumower Chassis to run up higher slopes with it (tested up to 30 percent). This works by
- turning the front drive into a rear drive and so requires to reverse the drive direction (so front is back and back is front)
- optional: modifying the tire profile (give it more grip)
- Modify tire profile OR
- Off-road version (sand etc.): A bicycle tube or U-form rubber is added around the tire
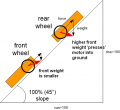
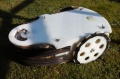
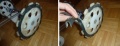
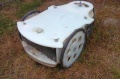
difference front/rear wheel
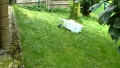
environment with slope
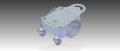
Ardumower going on a Safari
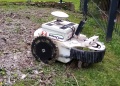
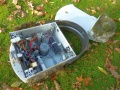
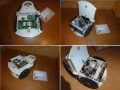
Ardumower electronics
Ardumower BumperDuino


Needed parts
- cup
- acrylic glas sheet (1mm)
- rubber band (U-form)
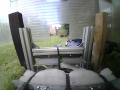
Turning front drive into rear drive
- on PCB, swap right motor cables with left motor cables (so left motor is right motor and vice versa)
- on PCB, swap polarity of each motor (so turning forward is turning backward)
- on PCB, swap odometry cables (so left odometry is right odometry and vice versa)
- mount battery charging pin at chassis handle side
- disable ultrasonic sensor
- move perimeter coil from old front to old back side (if using perimeter sensor)
- use BumperDuino as bumper sensor
Step 1: reverse the direction (front and back), add cup
Alternative: reverse the direction (front and back)
Step 2: Add acrylic glass sheet (1mm)
Step 3: Add rubber band
Step 4: Reverse docking contacts
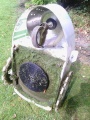
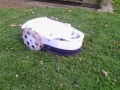
Step 5a (optional): Modify tire profile
Step 5b (optional): 'Off-road' tire mod using rubber


New rubber tires (optional)
For even higher traction, one can use pushcart tires from the shop. Using a 3d printed adapter one can mount them onto the Ardumower clamping element.

pushcart tires adapter
version 1 (OpenSCAD): https://drive.google.com/open?id=1b2QyTGZAHqlq3FxoZMuL9yAjkAN27W_W
version 2 (STL): https://drive.google.com/open?id=1Z5-RnOGF6VBqRKgV-_IFwwNccazjhj48
https://forum.ardumower.de/threads/traktion.22179
https://forum.ardumower.de/threads/3d-teile-und-zubeh%C3%B6r-f%C3%BCr-den-ardumower.22588/
Pictures
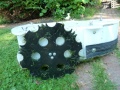
Tire mod with U-form rubber
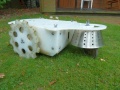
Inside (prototype)
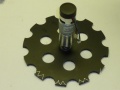
modified tire profile
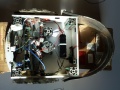
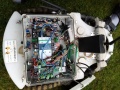
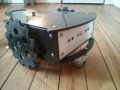
Inside (PCB)
'Off-road' tire mod using bicycle tube
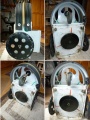
Electronics box
BumperDuino


Videos
- Ardumower rear/front driven climbing difference
- Ardumower rear-driven, BumperDuino demo
- pushcart tires
- Demo
- Optimized tires
- Bicycle tube tires for 'off-road'
Other ideas
rear driven (idea)
rear driven (experimental)
